SHaped face Mask PRINTABLE PATTERN
By Angie Herbertson, Sewing Face Masks, Scrub Caps, Arm Slings, & More
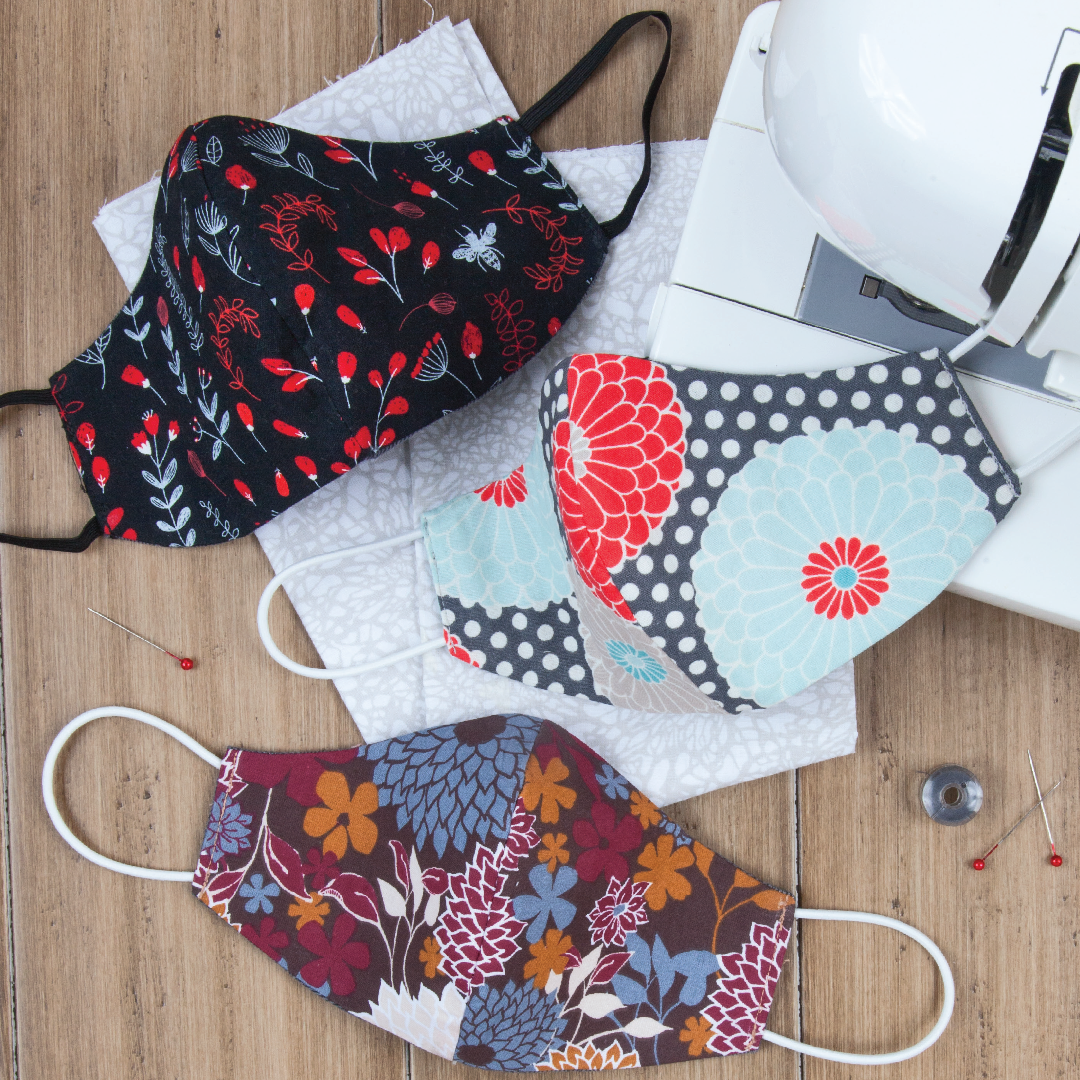
Learn how to sew a face mask to keep yourself and the people around you safe! Masks, unfortunately, have been a fashion accessory in 2020. The CDC recommends homemade face masks to stop the spread of Covid-19. Angie Herberston, Author of Sewing Face Masks, Scrub Caps, Arm Slings, and More, is a pattern designer that specialized in sewing scrub hats and PPE pre-covid and is the owner of her e-commerce website, A Design By Angie. Sample this fitted mask project from her new book below.
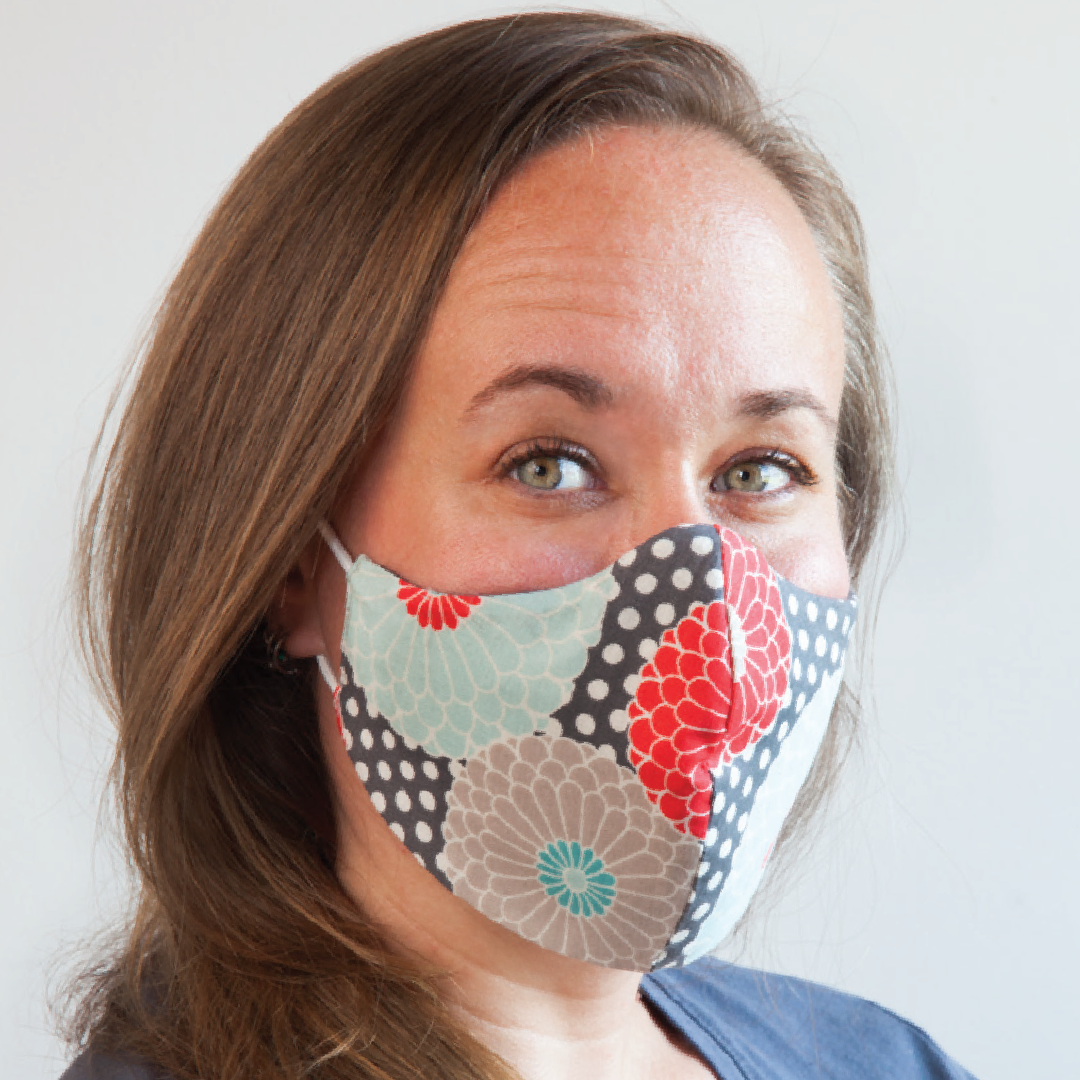
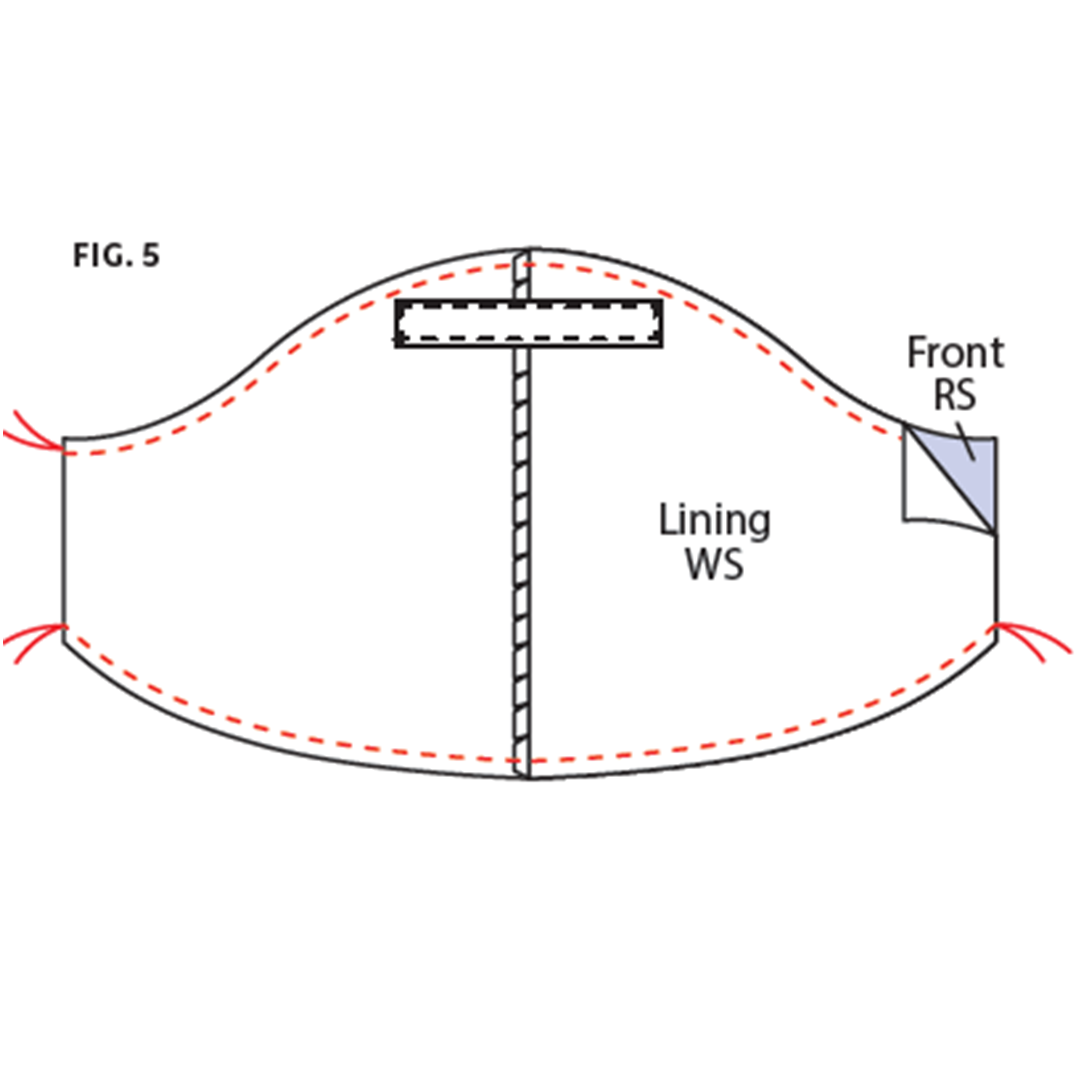
Fit is very important when wearing a face mask, and this design below, with a curve to the lower edge, has proven to provide a superior fit. The most important step in construction is making sure you securely fix your stitching at the sides of the mask before turning right sides out, as the opening is slightly smaller than other designs, meaning that turning puts added stress on those stitches.
ABOUT THE BOOK
Sewing Face Masks, Scrub Caps, Arm Slings, and More presents simple projects and sew-ables that can easily be made and donated or given to loved ones. Each project is a teaching tool to walk the new sewing enthusiast through basic skills. The projects range from a simple, happy pillowcase to brighten up a hospital room, to a more advanced wheelchair caddy or scrub hat in bright fabrics.
HOW TO SEW A FACE MASK
1. Interfacing is optional. Trim away a scant 1/4″ (0.6cm) around all four edges of your interfacing mask pieces. Fuse to the quilter’s cotton mask pieces (outer mask) following the manufacturer’s instructions (fig. 1).
2. Place the outer mask pieces right sides together and stitch the front curved seam (fig. 2a). Repeat for the flannel mask pieces (fig. 2b). Along the curved edge, carefully clip perpendicular to the seam line in the seam allowance on both the outer mask and the flannel lining (fig. 2c). Press so that the seam allowance of the mask is to the left and the lining is to the right. Set aside the outer mask.
If using round elastic cord rather than flat elastic on a face mask, always tie a knot at each end that will rest beyond the stitch line so the elastic does not pull out when it’s stretched.
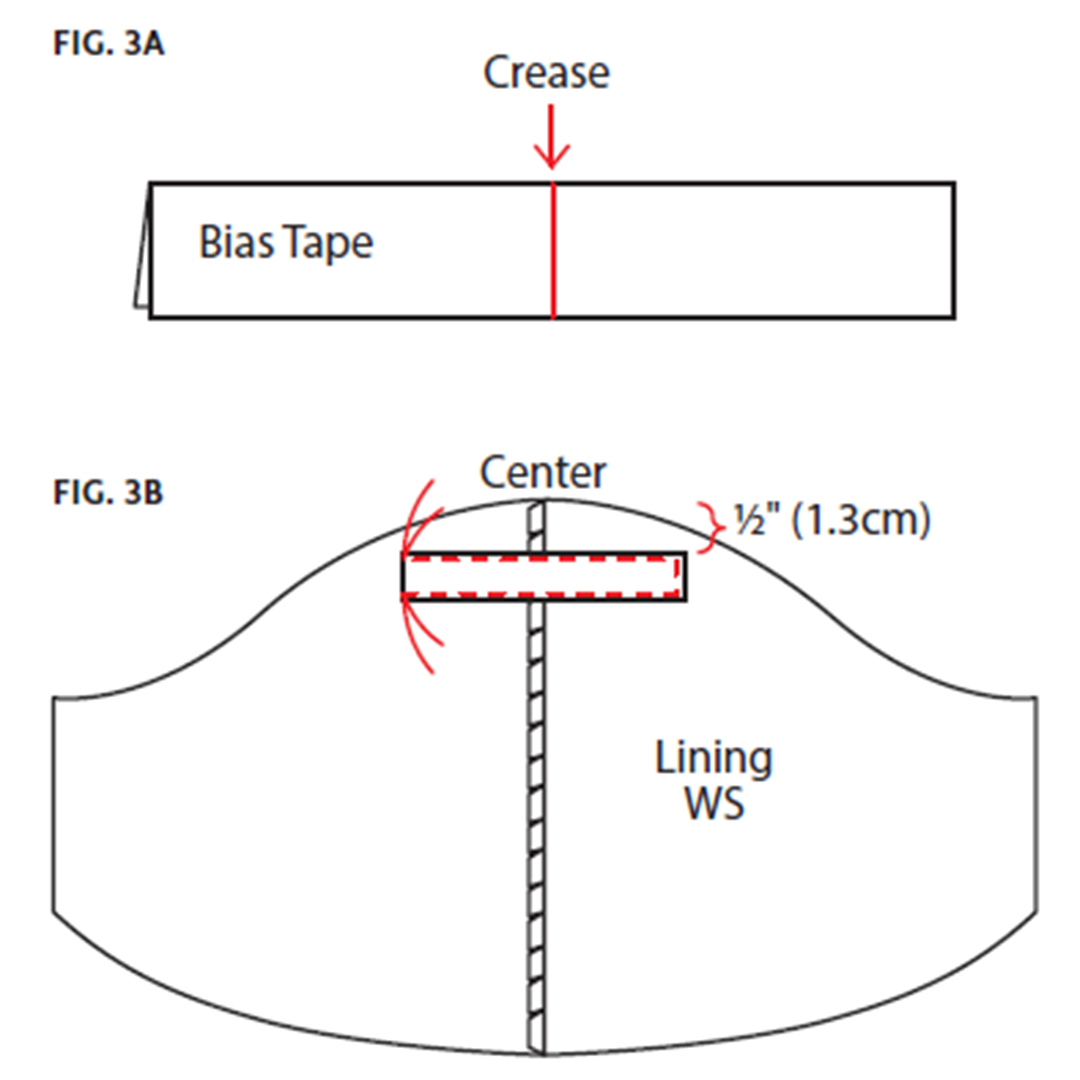
3. Fold the 3″ (7.6cm) piece of bias tape in half, short ends aligned, and press to crease the center; unfold (fig. 3a). Position the bias tape approximately 1/2″ (1.3cm) from the top edge, wrong side of tape to wrong side of lining, with the center crease of the tape aligned with the center seam of the lining. Pin. Stitch around three sides of the bias tape a few threads inside the edge, leaving one short end open (fig. 3b).
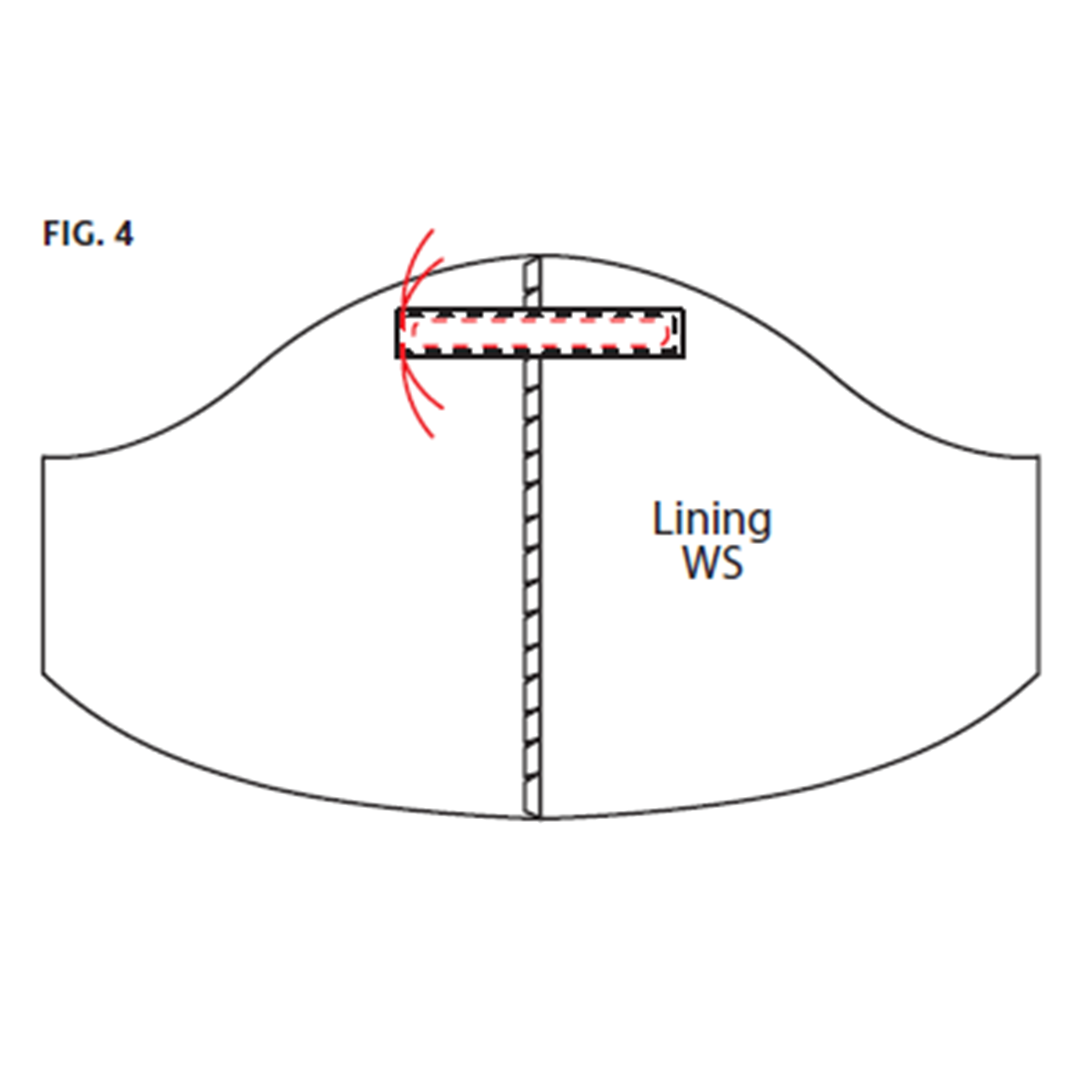
4. Insert the metal nosepiece into the casing, making sure it is completely inserted and that at least 1/8″ (0.3cm) of the bias tape can be stitched down at the open end. If not, trim the nosepiece and re-insert. Stitch across the open end of the bias tape, securing the nosepiece in the casing (fig. 4). Remember, if you do not have a nosepiece, you can make a great substitute from an aluminum pie pan; see page 63.
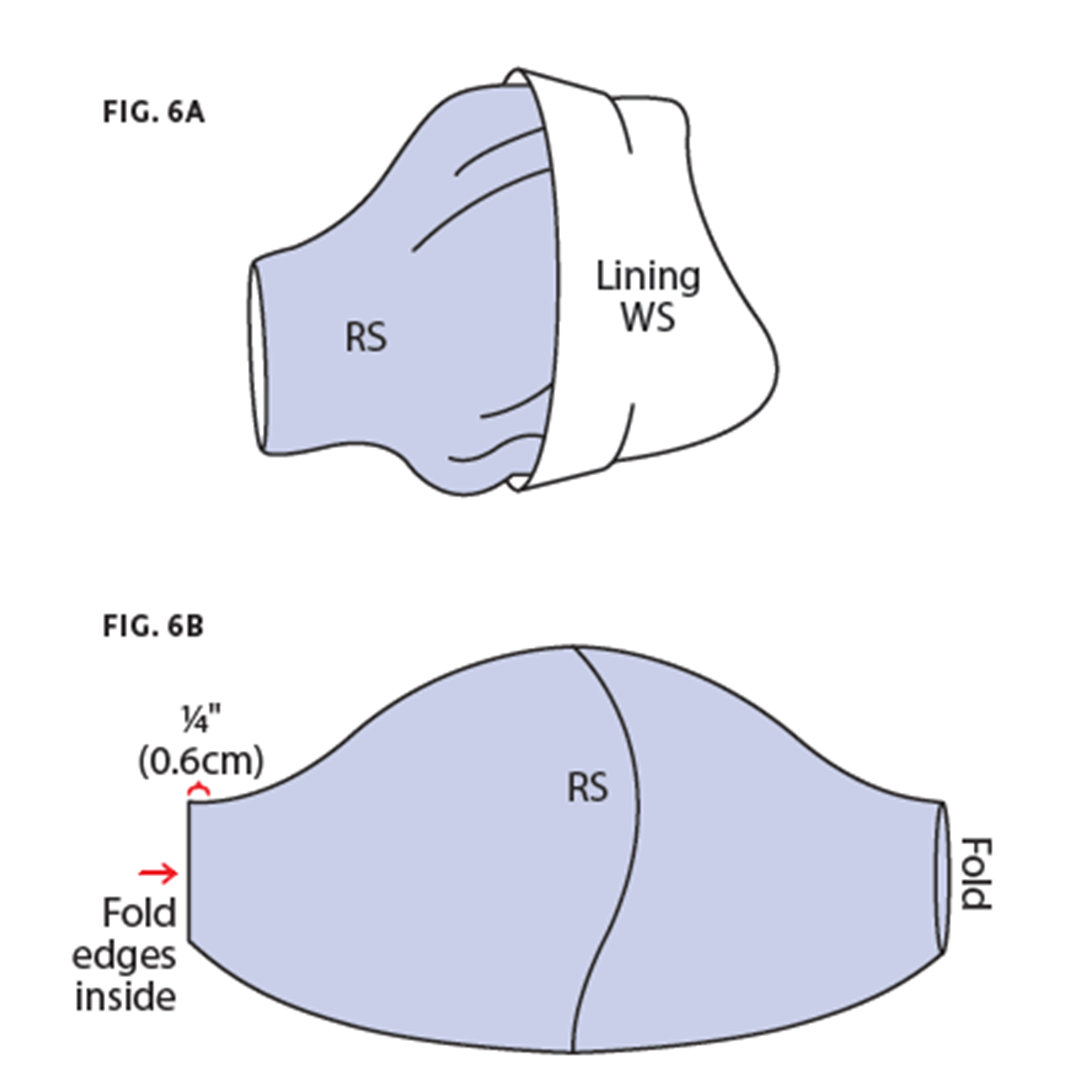
6. Turn the mask right side out through one of the open sides. This design takes a little tugging, as the opening is slightly small, but work slowly, pulling a little bit of fabric at a time. Once it is right side out, press firmly around the edges (fig. 6a). Fold the raw side edges to the inside 1/4″ (0.6cm) and press (fig. 6b).
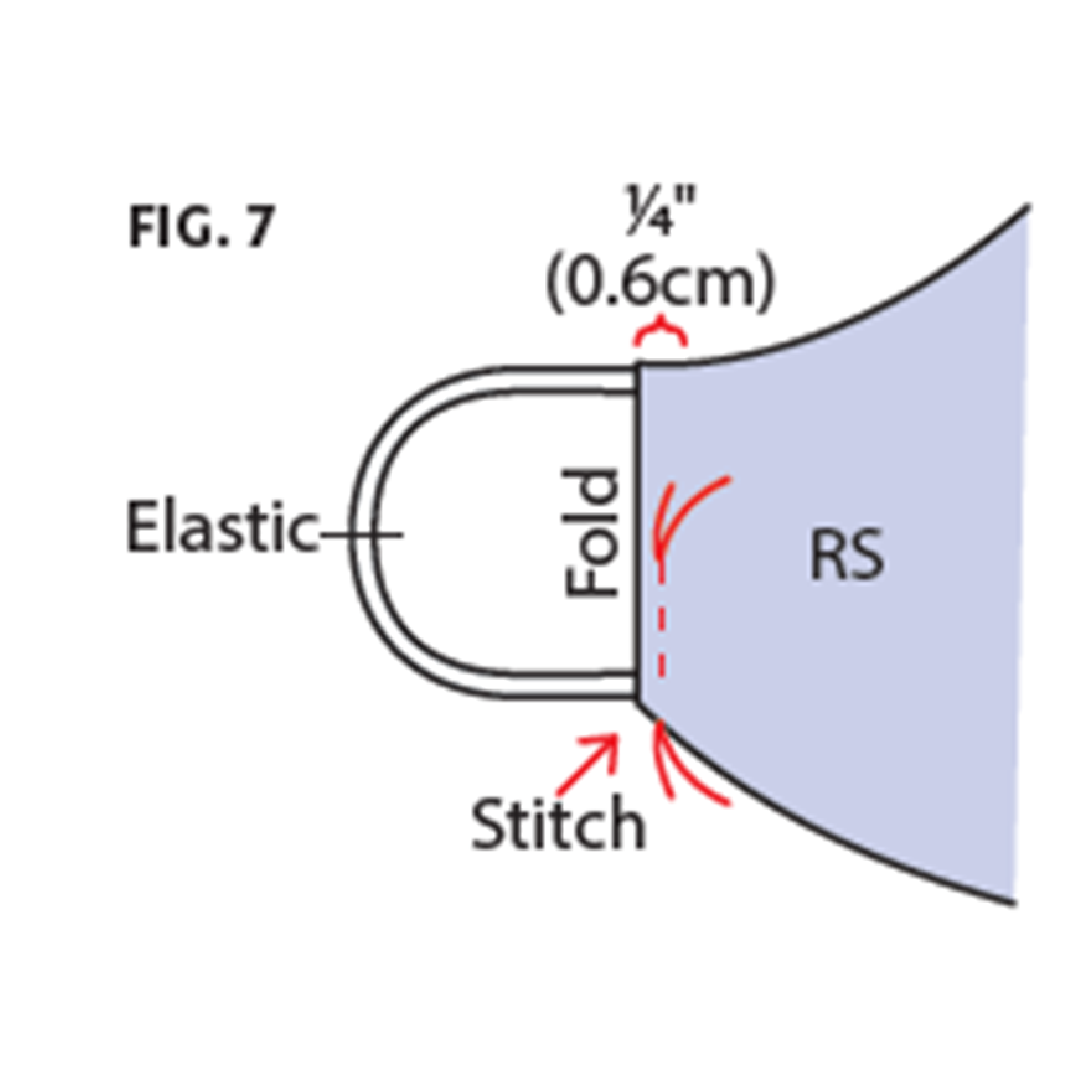
7. Insert one end of the elastic at the lower end of the side opening so that it overlaps 1/4″ (0.6cm) inside the mask. Pin. Insert the needle about 1″ (2.5cm) above the elastic and stitch down to the end of the mask. Stitch back and forth several times at the lower edge to secure the elastic. Stop stitching and clip the threads (fig. 7).
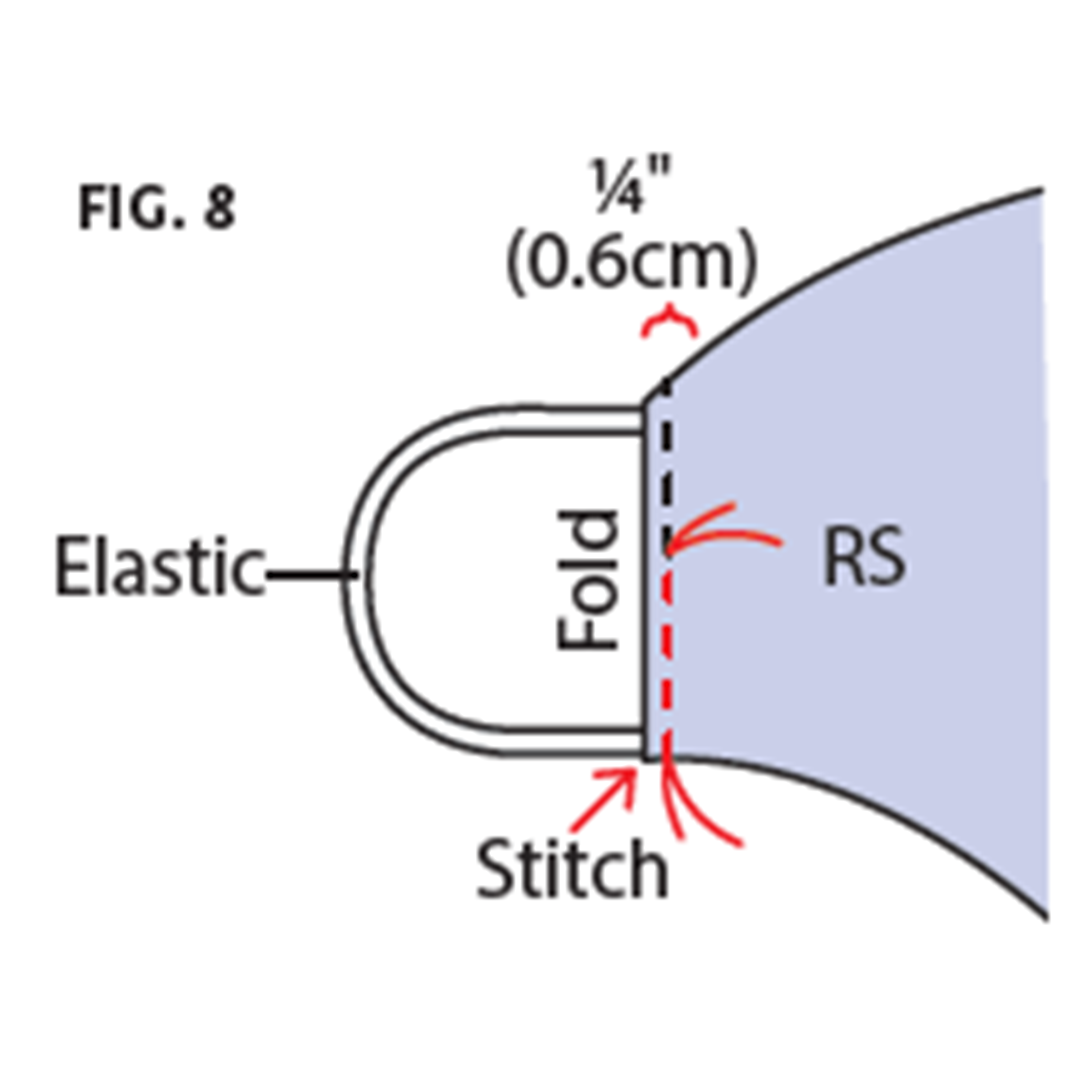
8. Turn the mask so that the top edge is now at the bottom. Insert the opposite end of the elastic. Pin, making sure your elastic isn’t twisted. Insert the needle where you started stitching at the bottom of the mask and continue stitching to the top of the mask, stitching back and forth several times over the elastic to secure it. Repeat for the opposite side of the mask (fig. 8).
Metal nose bridge strips—for incorporating into face masks—can be purchased in bulk packages online if you plan to make multiple masks. If, however, you don’t anticipate making many masks, an easy alternative is to cut a 2 3/4″ x 3/4″ (7 x 1.9cm) rectangle from an aluminum pie pan, pizza pan, or other baking pan. Fold over 1/4″ (0.6cm) and 1/4″ (0.6cm) again lengthwise. Voilà! Instant nose bridge.

